
As an Amazon Associate, I earn from qualifying purchases. This post contains affiliate links to Amazon.co.uk where I may earn a small commission at no extra cost to you.
How to Fix Scratched Lacquer Without Sanding: The Professional UK Guide
Discovering a deep scuff on a cherished Ercol sideboard or a high-gloss guitar finish is gut-wrenching. However, unlike modern polyurethane, lacquer is a thermoplastic substance, meaning you can often fix scratched lacquer without sanding by using chemical “reflow” techniques. By re-melting the existing finish, you can erase surface damage without the mess of dust or the risk of sanding through the veneer.
The Quick Answer: How do you repair lacquer scratches without sandpaper?
To fix scratched lacquer without sanding, you must determine if the scratch is superficial or deep; superficial scratches can be removed with a high-quality rubbing compound, while deeper marks require a lacquer retarder or amalgamator to chemically melt and “reflow” the finish back into the groove. For deep gouges that reach the wood, a wax filler stick colour-matched to the timber is the most effective non-abrasive solution.
The Fingernail Test: Can you truly skip the sanding?
The “Fingernail Test” is the industry standard for assessing whether a chemical-only repair is viable. Run your nail gently across the scratch; if your nail catches in the groove, the lacquer has been physically displaced and may require a “burn-in” filler. If it slides over smoothly but leaves a white mark, you are dealing with clear coat marring—a perfect candidate for solvent-based restoration.
How do you identify nitrocellulose vs. polyurethane?
You can identify the finish by dabbing a small amount of lacquer thinner onto an inconspicuous area with a cotton bud. If the finish becomes tacky or dissolves within seconds, it is genuine lacquer; if the solvent beads up or has no effect, you likely have a cured polyurethane or varnish which, unfortunately, cannot be “reflowed” and may require traditional abrasive repair methods.
Method 1: The Solvent “Reflow” Technique for Furniture and Guitars
The solvent reflow technique works by using a slow-evaporating solvent to temporarily liquify the edges of the scratch so they flow together. This is the “holy grail” of restoration because it preserves the original patina of vintage pieces while removing spiderwebbing or checking.
- Clean the area thoroughly with white spirit to remove any wax or silicone polish.
- Apply a small amount of Lacquer Retarder to a lint-free cloth or a fine-tipped artist brush.
- Lightly touch the scratch. You will see the white line disappear as the solvent atomises the lacquer and levels the surface.
- Allow it to dry for 24 hours in a well-ventilated room before buffing.
What is a lacquer amalgamator?
A lacquer amalgamator is a specialised solvent blend designed to “knit” together old, brittle finishes that have developed fine cracks. It is more forgiving than straight lacquer thinner, as it contains resins that help bridge gaps without causing the finish to run or sag on vertical surfaces.
Method 2: Using Rubbing Compounds for High-Gloss Finishes
Mechanical polishing is the best way to fix scratched lacquer without sanding when the damage is limited to the very top layer of the gloss. This method uses micro-abrasives suspended in a liquid to “level” the scratch until it is no longer visible to the naked eye.
Recommended Tools for UK DIYers:
| Tool Type | Best For | Recommended Product |
|---|---|---|
| Fine Polishing Compound | Surface scuffs / Haze | Farecla G3 Liquid |
| Microfibre Applicator | Manual Buffing | Amazon Basics Microfibre Pads |
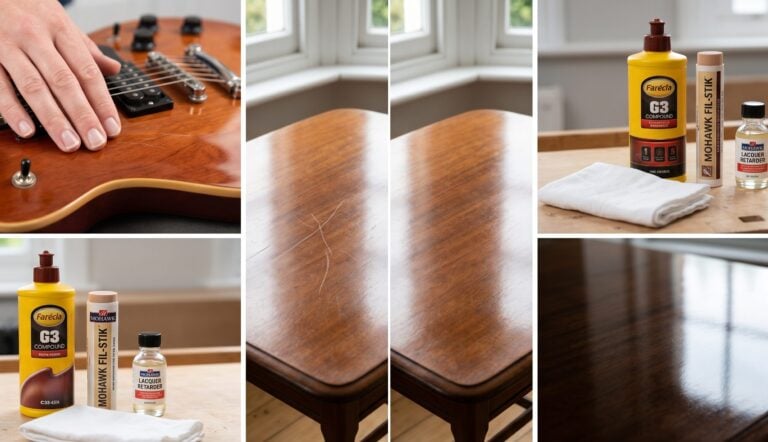
| Wax Filler Sticks | Deep gouges/chips | Mohawk Fil-Stik |
Common Pitfalls: Why “DIY Hacks” can ruin your finish
Avoid using olive oil, walnuts, or WD-40, as these introduce non-drying oils into the wood grain. According to the Woodworkers Institute, these substances can prevent future professional coatings from adhering, leading to a permanent “fish-eye” defect that is nearly impossible to fix. Stick to solvent-based repair for permanent results.
Be particularly wary of silicone-based furniture polishes found in many UK supermarkets. These create a barrier that interferes with the chemical bond of the lacquer. Always prep the surface with a dedicated de-waxer before attempting a repair.
Frequently Asked Questions
Can I use car polish on wood lacquer?
Yes, most high-quality car polishes, like Autoglym Super Resin Polish, are safe for high-gloss nitrocellulose guitar and furniture finishes, provided they do not contain heavy silicones. They are excellent for removing fingernail scratches around door handles or guitar pickguard areas.
How do I fix “blushing” (white clouds) without sanding?
Blushing is caused by moisture trapped under the surface. A light misting of lacquer retarder will often open the pores of the finish, allowing the moisture to escape and the “cloud” to vanish instantly. This is a classic professional furniture restoration trick.
Conclusion: Restoring the Mirror Finish
You don’t need to be a professional French polisher to achieve stunning results. By understanding that lacquer is a living, reactive finish, you can use chemistry to your advantage. Whether you choose a solvent reflow for a vintage guitar or a rubbing compound for a dining table, the key is patience and using the right materials.
Ready to start your project? Check out our curated list of Professional Lacquer Repair Kits on Amazon UK to get everything you need delivered tomorrow.